Last Updated on by Vairo Kremanis
Whenever you decide to move your WordPress website to a new web hosting service, there is a risk of data loss and potential downtime. However, with proper knowledge and implementation techniques, you can move WordPress websites to new domains seamlessly without any data loss and no downtime.
It is important that you do not lose data during the transition process also. The 6 steps described below will guide you in a structured manner so that you may execute the transition successfully.
Step 1: Choose Your New Host
This is the obvious first step. You need to be selective in the process of finalizing the new host so that you have no problems in the future.
Keep in mind your current expectations from the hosting service while estimating your growth in next 2-3 years; select the service provider who is able to meet your future demands also easily.
You may choose from the three main categories – shared hosting, cloud hosting and dedicated servers. While most hosting servers offer migration services for moving WordPress websites without charging, there might be small fees involved in some cases. Here’s a great guide by John Hughes on how to choose the right hosting.
Once you have selected your new hosting server, make sure you have the details of both your old and new web hosts, along with a File Transfer Protocol (FTP) tool handy. You may also delete older backup files, clear cache, delete unused themes and plugins, clear all spam from your website. This will ensure smaller file sizes and faster migration process.
Step 2: Install Duplicator

Now, you need to install and activate the ‘Duplicator‘ plugin on your old website. This plugin is free of cost and is a very useful tool to move WordPress websites to new domains.
After activation, go to the ‘Packages’ section and click on the “Create New” button located at the top corner on the right side.
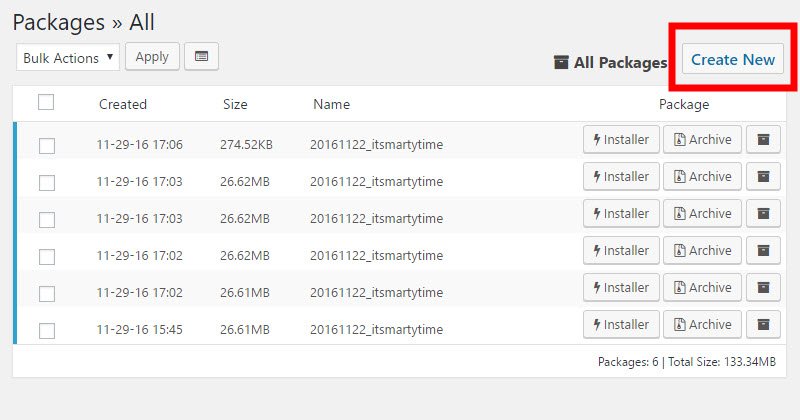
Follow the subsequent instructions as they appear after clicking on the ‘Next’ button. Once scan result shows ‘Good’ against all the parameters on the screen, click on the ‘Build’ button to generate the ‘Installer’ and ‘Archive’ files to download the packages.
The ‘Archive’ is a copy of your WordPress site, while the ‘Installer’ will automatize the process of installation on your new web host.
Step 3: Importing the Old Website to the New Host
The ‘Archive’ and the ‘Installer’ files created previously now needs to be uploaded to your new web host. You may use a free FTP tool to aid in the process.
You need to enter the IP address of your new host in the FTP plugin settings so that the files are transferred to the new host instead of the old. These files need to be stationed in the root directory of your new hosting service, enquire with the service provider for the exact location and pathway.
The installer.php and the archive.zip file needs to be in a completely empty root directory, so ensure the same before the transfer process.
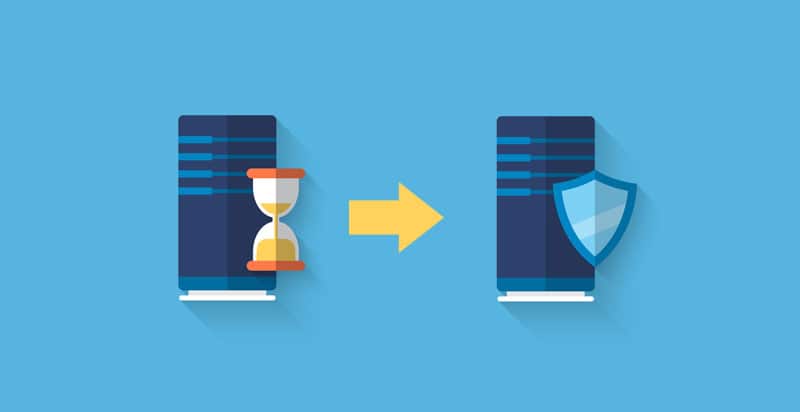
Step 4: Ensuring Zero Downtime
After the upload process is complete, access the ‘installer.php’ file through a web browser. The command will return a 404 error as your domain is still pointing to your old host. To solve this issue, you need to change the ‘hosts’ file on your computer.
Modification of this file allows the access to your new domain only through your terminal/IP address.
First, you need to find the shared IP address of your new domain. This is accessible through the ‘cPanel’ dashboard; click on “Expand Stats” in the sidebar and note the “shared IP address”.
Then, run your Notepad application in ‘administrator’ settings. Click on ‘File/Open’, then access the C:\Windows\System32\drivers\etc and select the ‘Hosts’ file. Here, enter the shared IP address of your new domain and your domain name to access you new host from your computer only.
The entire exercise described above ensures that there is no downtime of your website. While you are running the migration processes, other users can still access your website on the old web host. After you are satisfied that the new hosting service is up and running, remove the entry from the ‘hosts’ file.
Step 5: Beginning the Migration Process
With the above exercise, you can now access your new domain from your computer. Run the “installer.php” file on a browser.
The installer program will ask for the database name at the beginning. You may create one through the ‘cPanel’ of your new hosting service. Keep a note of the database username and password. This information needs to be entered in the appropriate fields in the ‘Installer’ Setup.
Once completed, click on the “Test Connection” button; this verifies the link establishment with your domain. Once the connection is working, you need to scroll down and accept the “warnings and notices” and click on “Run Deployment”. This will start importing your old database which may take some time depending on the size.
Next, the Installer will ask for verification of the URL pathways. Check for its accuracy and click on “Run Update” for completion of the process.
Then, you may check the processes are in working order one by one; click on each of them in order as shown on the display panel to verify they are functioning perfectly.
Lastly, you need to remove the changes you had done in the Windows ‘hosts’ file of your computer in Step 4.
Step 6: Changing Domain
Till now, you have made a complete copy of your website to the new web hosting service. However, the old account of your host is still operational. You need to change the DNS ‘nameservers’ so that the visitors are taken to the new location of your WordPress website instead.
In case you are registered with the new service provider, the best practice is to transfer your domain to the new host. To do this, you need to update your ‘nameserver’. They are generally two URL addresses, somewhat like “ab1.hostname.com” in structure.
You can ask your web service provider for assistance in this matter also. Different web hosting services have different setups for the update process, but basically, you need to find the ‘Nameserver’ button in your “Domain Management” area.
Clicking on the ‘Manage’ or similar button under ‘nameserver’ will take you to the “Nameserver Settings” screen. Here, you need to enter the new DNS server information. Depending on the number, the changes may take between 4 to 48 hours for full propagation to all users.
So, the six steps described above will ensure a seamless transition to a new web host with zero site downtime in the process. To err on the side of caution, wait for some days before closing your account on the old host.