Last Updated on by Vairo Kremanis
Uninstalling WordPress may not be something that everyone finds themselves doing with any sort of frequent regularity. But… it can be a fail-safe fallback for solving issues when all other measures fail.
With that being said, it is important to keep your SEO and Data up to date. You certainly don’t want to lose anything – and in this article, we are going to discuss how to go about with this process.
Why Would You Want To Uninstall And Reinstall WordPress?
This is a good question. And to be fair, uninstalling should never be your first option. Most problems are easy to fix without taking such a drastic step.
But… with that being said, some issues that cannot be fixed with any other troubleshooting method can, in fact, be fixed like this.
Here is what you need to know.
Getting Started: What You Have To Do BEFORE You Uninstall
Before you even think about uninstalling, create a complete backup of your existing WordPress site. The best way to do this is with a WordPress backup plugin. We actually recommend Backup Buddy… but to be honest, there are a lot of good ones out there.
Make sure that all of your files are saved securely… either on the cloud, in Google Drive, or on your computer.
This backup is not necessarily needed to reinstall WordPress, but it is a very good idea to keep it, just in case something goes wrong.
The First Step: Export Your Content
So, the first step to successfully uninstalling and then reinstalling WordPress is to export your content. This export will contain a lot of data personal to your site… posts, pages, comments, categories, etc.
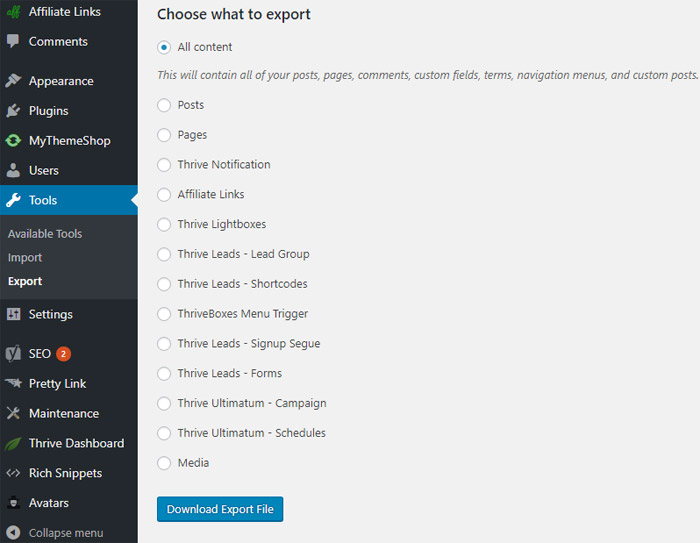
To do this, you need to go to the WordPress admin area. Then, go to Tools >> Export. Select all content, and then simply click the ‘Download Export File’ button.
The Second Step: Downloading The WordPress Content Folder
The /wp-content/ folder of your WordPress site contains plugins, images, themes, and uploads – everything that you used to create your site. You need to make sure that all of this is downloaded so that you can reinstall it all later.
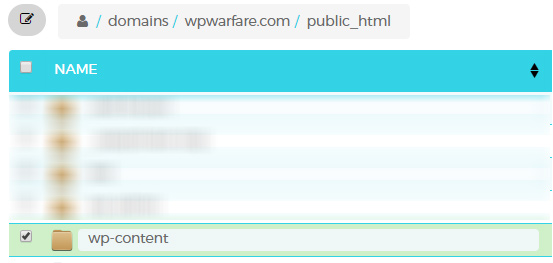
This is where it gets a little more complicated. You need to connect to your site using an FTP client, or a file manager in cPanel, and then select the wp-content folder. Once you have done this, you can download it to your computer.
If you need a FTP client, we really like WinSCP for Windows users… but Cyberduck is also very good, and can be used with a Mac or PC.
At this point, you are ready to move onto the next crucial step – which is the actual uninstallation of WordPress.
Step Number Three: Uninstalling WordPress (The Right Way)
This part is also a little bit technical – but bear with us. To begin this step, you need to use an FTP client or file manager in cPanel to delete all WordPress files from your WordPress site.
Now, with that being said, a lot of people wonder if they should delete their WordPress database – but you actually don’t have to. You might want to check with your hosting company, but most hosting companies will allow you to have as many usernames and databases as you want – so instead of deleting the old one, you can just create a new one.
To do this, you will need to log in to your cPanel account. Once you’ve done this, you need to click on the ‘MySQL Databases’ icon. There are different Cpanels and ways you can do this so we won’t be describing this in more detail. Simply follow the guide and create a new Database through your own Cpanel.
This should bring you to a page where you can add a new database.
You will then need to scroll down to the ‘MySQL Users’ section and add a new user. Once you have done this, you will need to add the new user to the database that you just created. You will need to scroll down to the ‘Add user to database’ section of the page, and then match up your new username with your new database.
This new database is the one that you should use when you reinstall WordPress.
Step Number Four: Installing A Fresh Version Of WordPress
The first part of this is pretty simple. You need to go to WordPress.org and download a fresh copy. After you have finished this part, you need to unzip the file. You will find a folder that contains all of the files needed to reinstall WordPress.
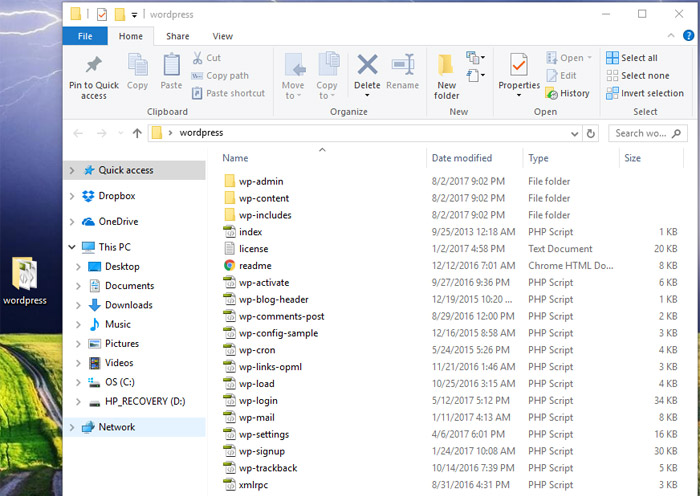
The next step is to upload these files to your website. This is best done using your FTP client. After you complete this task, you should go to your website. WordPress will then ask you for your database information.
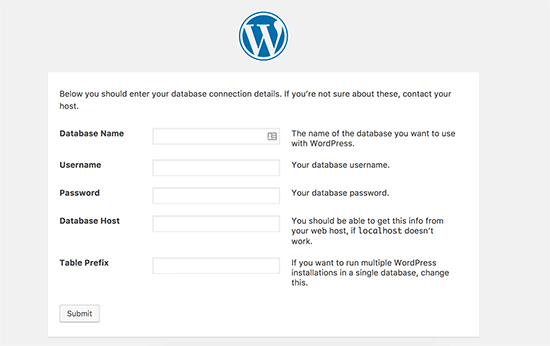
This is where it is crucial to provide the name of the database, along with the username and password, that you created earlier (the new ones). After you fill in all of the applicable information, you will need to try to connect to your database. If everything worked right, you should see a success message, and you will be able to click on a button labeled as ‘Run Install’ to continue onward.
This will lead to a process where you will be asked to provide your site information. This will include the title, description, admin email, password, etc. Fill all of this out as needed, and finish the installation.
Step Number Five: Logging In
For this next step, you will go to the admin area (making sure to use the username and password that you created earlier) and log in. Once you do, you will need to delete all of the default content. In other words, all of the little text boxes and sample images that were on the site when you created it need to be erased. Once you have done this, it will be time to restore the content that you used to have on your site.
Step Number Six: Restoring The Images, Theme, And Uploads
If you will remember back to earlier, we had you download a wp-content folder. Well, in this step, you are going to use that to get all of these things back.
First, you will need to connect to your website using your FTP client. Then, you need to go to /wp-content/ folder.
Then, on your side of things, you need to select the /wp-content/uploads/ folder from your own computer. This folder will need to be uploaded to your website.
You can also upload any changes that you have made to your themes by finding the theme folders, which you can find in /wp-content/themes/.
Step Number Seven: Import All Of Your Content
Alright. At this point, you are almost done! Your WordPress site now has all of its themes, images, and uploads back – but you still need to import all of the content that you amassed before uninstalling.
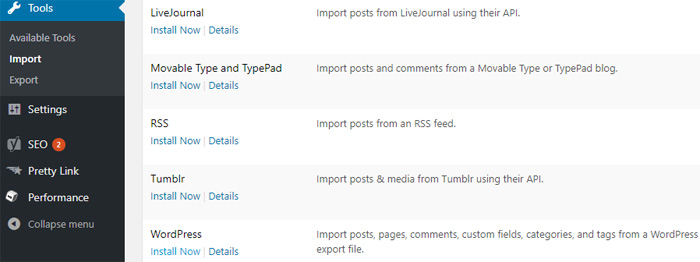
To do this, you will want to go to Tools >> Import. You will see a button underneath the WordPress section that says ‘Install Now’, and you will want to click it.
Once you do this, WordPress will install the WordPress importer, which is what you will need to import your content. You will need to click on the ‘Run Importer’ link once this is complete. After this, you will be taken directly to the importer page, where you will need to click on the button that says ‘Choose File.’
Now, this next part is very important. Once you do this, you will need to select the XML file that you downloaded way back in the beginning of the process, back in step 1. Once you have done this, you will need to upload that file and import it. There is a button that will literally be labeled as ‘Upload file and import.’ So use that.
WordPress will, at this point, ask you if you wish to create new authors, or just assign all posts to your current account. If you wish for the authors to stay the same as they were, do nothing. If you wish for changes, then make them as needed. This part is pretty self-explanatory.
Once you have done all of this, click on the submit button to continue onward. This will cause WordPress to begin importing all of that content that you saved into your new, fresh WordPress site.
After this, the only thing left to do is to install your plugins. You should install them one at a time, and you might need to adjust their settings as you do so, just to make sure that they are going to function properly.
But… once you have completed this part, you will find that your new, clean WordPress installation is finished. That’s pretty much all you need to do to uninstall and then reinstall WordPress without losing your content.
There might be some parts that seem a bit technical – but with a bit of research and some careful attention to detail, you shouldn’t have a problem with it!


