Last Updated on by Vairo Kremanis
This is how you do it!
If you have a WordPress site and are looking to monetize it (or monetize it further than it is already monetized), then you might be wondering how to take the next step. Obviously, displaying ad blocks within specific parts of some of your posts could be an awesome way to do this – but if you have ever used WordPress a little bit, you might be wondering how to do that without throwing everything off-kilter!
Obviously, if you know how to code, this may not be a difficult problem for you. But if you don’t code and don’t want to break your site, this is more challenging than a lot of people realize!
But in this post, we are going to walk you through the process. So let’s get started.
Why Would You Want To Display Ads Within Specific Posts On WordPress?
Before we start talking about the technicalities, it can be helpful to understand why someone would want to do this to begin with.
A lot of people use sidebar and banner ads on their sites – and for good reason. These spots on a web page offer you great placement that doesn’t really hinder the content.
But, since banner ads and sidebar ads are so common nowadays, a lot of internet users have developed what they call ‘banner blindness.’ This is a condition in which they have become very proficient at ignoring banner ads altogether.
This hurts click-through rates, and causes your site revenue to drop.
One way to counter this, however, is to insert ads into specific parts of your WordPress posts. Of course, you need to be careful here. You don’t want to burn users out by over-advertising. But… a few carefully placed content ads throughout your site can do a lot to help increase the click-through rate, which is pretty awesome.
So, without further delay, let’s talk about how it’s done.
Displaying Ads In Your WordPress Posts: How To Get Started

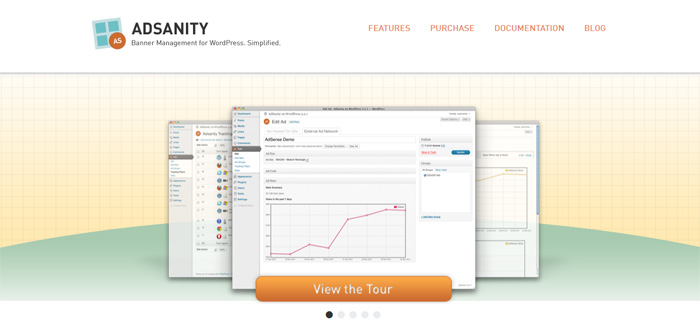
So, the first step to doing this is to install a plugin to help. Our favorite, by far, is called Adsanity. This is basically a plugin that helps you to manage ads on WordPress… but as far as we are concerned, it is pretty dynamite, and definitely worth the yearly fee it costs. It will cost you anywhere from $39 a year to $139 a year, depending on what license you get – but it is certainly worth it!
Anyway, once you install the plugin and activate it, you need to go to Adsanity >> Create Ad. This page will allow you to create your first ad. You will need to title it and choose what type of ad you wish to create.
But, one thing that is cool about Adsanity is that it gives you the ability to use hosted or third party ads as well, which will help tremendously.
If you are using hosted ads, you need to select the size of the ad, and then enter a tracking URL. You also need to provide the image that you wish to use for the ad.
If you are using third party ads, such as those used in ad networks (like Google Adsense), then you will need to go to a different tab. Go to the ‘External Ad Network’ tab, and select the ad size there. Then, you can paste-in the ad code that you received from the network.
Publishing the ad is pretty simple from that point, or you can schedule it to be published later. Once the ad has been published, you can pretty much put it anywhere you want.
How To You Put The Ad Into Your WordPress Post?
To do this, you will need to edit the page/post where you want to display the ad block. In the visual editor, you will find two buttons that will help to do this. They’re called ‘Insert Ad’ and ‘Insert Ad Group.’ Here, click on the ‘Insert Ad’ button.
Choose the ad you wish to display and click on the insert link.
Once you do this, the ad shortcode will show up in your post. You can now save the post and look at the ad.
You can also use shortcode to put your ad in the post. To do this, go to Adsanity >> Manage Ads. Here, you will find a list of ads that you have made. You can grab the shortcode from each of these, and then take it and go in to edit the post you wish to place it in.
Just paste in the shortcode where you want it, and you should be good to go!


