Last Updated on by Nick Braithwaite
Making your website fully accessible is not only a good design choice but also a great business decision. An accessible site helps spread your message, market your business, or even sell your products to as wide a group of people as possible. It ensures anyone can easily access and understand your online content. From people with disabilities to those with slow network connections, if you’re not running an accessible website, you might be losing a lot of potential clients.
Creating an accessible site isn’t always that simple. There’s lots of factors to consider. Adding proper alt tags for your images, creating transcripts for your videos, and optimizing both your design and your actual content are just some of the things you’ll have to deal with. But luckily, as is usually the case with WordPress, there’s a plugin that can help you out. Accessibility Checker Pro performs a thorough review of your entire website and provides a clear overview of all the things you could improve upon to make your content more accessible.
Let’s take a look at how it works.
Installing Accessibility Checker Pro
Once you purchase a copy of Accessibility Checker Pro, you’ll be provided with a zip file and a license key. You can install the plugin like you would any other third party WordPress plugin – by uploading it to your server either via FTP or through the WordPress dashboard.
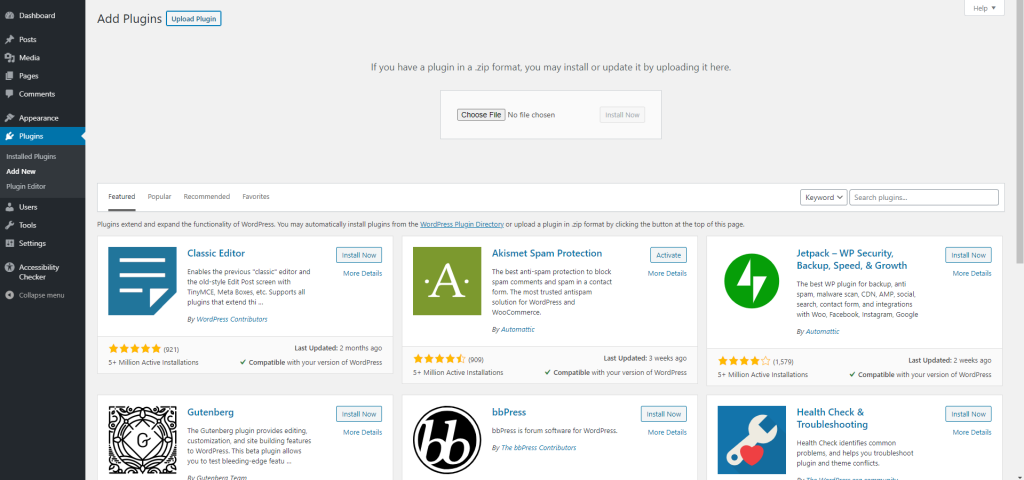
However, when you activate Accessibility Checker Pro, you’ll receive a notification prompting you to also install the free version of the plugin. This, while somewhat tedious, is both a simple and a required step. It’s only after you’ve activated the free version (available on the WordPress repository) that you’ll see the Accessibility Checker section in your left menu.
The plugin’s greeting screen offers a quick start video guide, as well as links to the documentation and support forums. But what you’ll want to focus on is the notification at the top of your screen, which lets you know you need to input your license key.
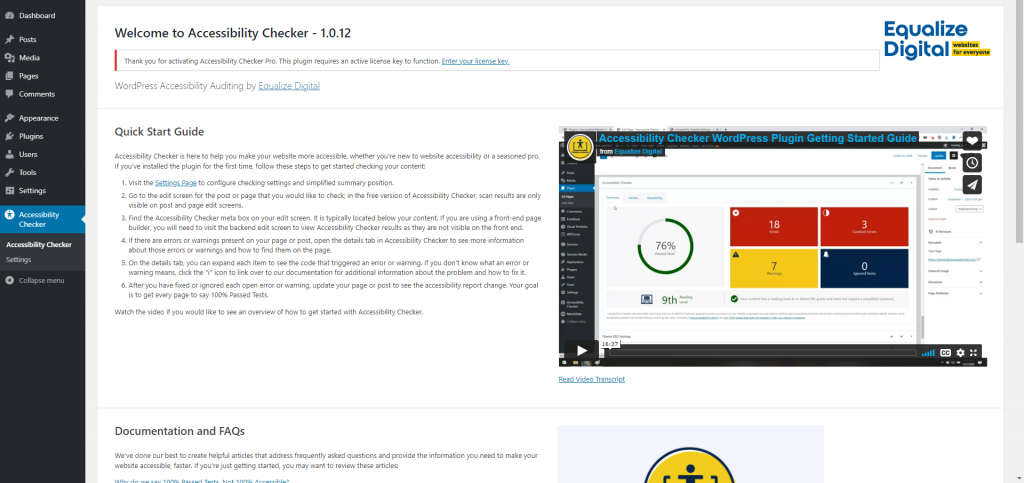
Once you do that, you’ll be ready to go.
Configuring Accessibility Checker Pro
From the Accessibility Checker menu, you can access your Open Issues, your Ignore Log, and your Settings, as well as perform a full site scan. The Settings panel is split into three sections. The first, General Settings, let’s you do things like choose which posts will be checked for accessibility and which users have the permission to move accessibility issues to the ignore log.
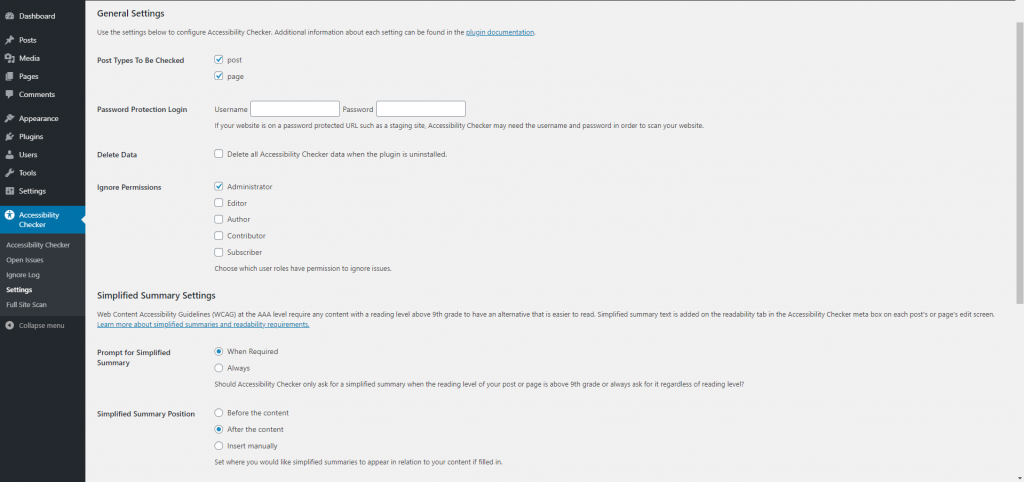
The most interesting section, however, is the second one – Simplified Summary Settings. Here, you can set up whether you’d like to be prompted for simplified summary issues and choose the position and heading for your simplified summary. And since Web Content Accessibility Guidelines require all content above a 9th grade reading level to have a simplified summary, if you want your site to be fully accessible, you’ll want this option enabled.
The third and final section of the settings lets you add a notification to your footer, informing viewers that you’re using the Accessibility Checker plugin to monitor your website’s accessibility. And while this might not seem like much, it’s really all you need in terms of settings. Accessibility Checker Pro is focused on one thing – making your website more accessible. It doesn’t want to distract you with unnecessary decisions. Instead, it makes sure that while you’re creating your content, you’re aware of its level of accessibility at all times.
Using Accessibility Checker Pro
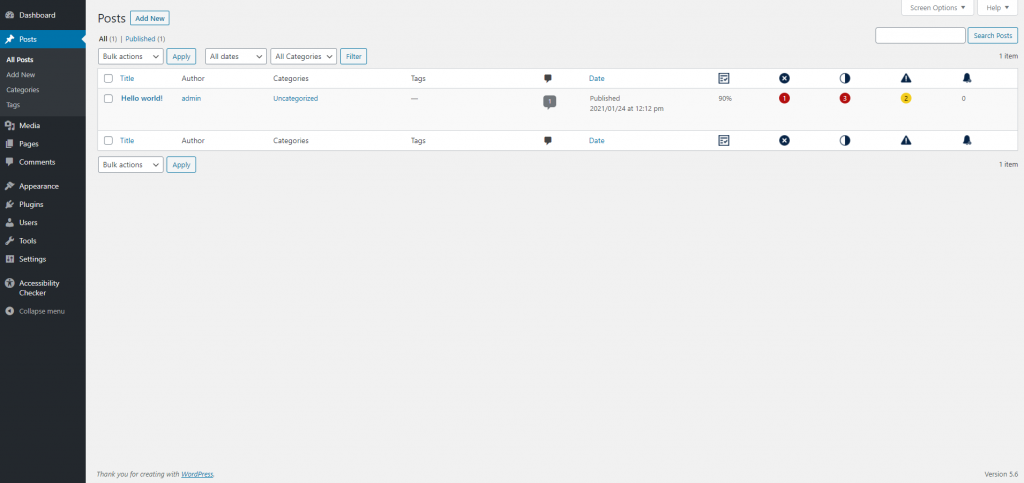
Now this is where Accessibility Checker Pro really shines. As soon as you jump into your pages or posts, you get an informative and easily readable overview of each post’s accessibility level. A percentage score shows how many accessibility tests the post has passed, and you can quickly see how many errors, warnings, and ignored issues it has.
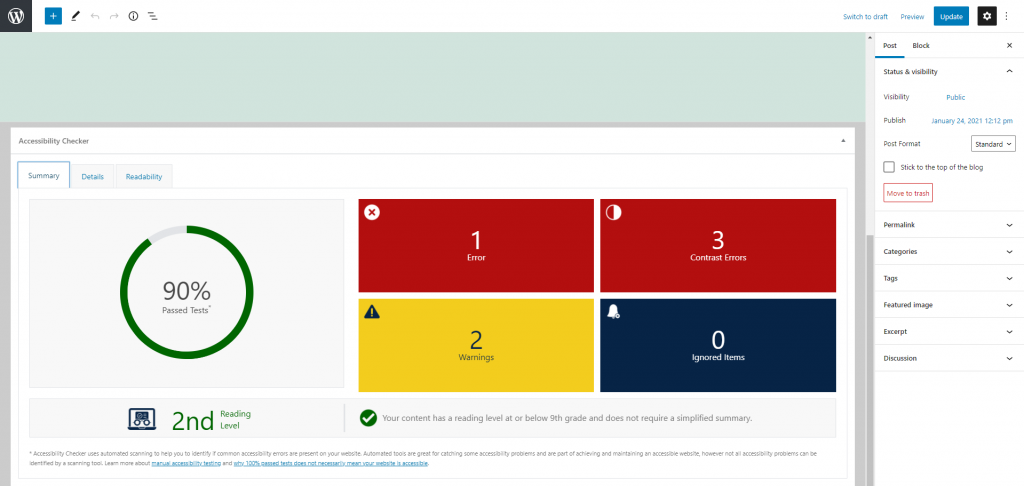
Once you dive into editing, things only get better. Right below your content, you’ll see a large section providing a clear summary of the post’s accessibility score.
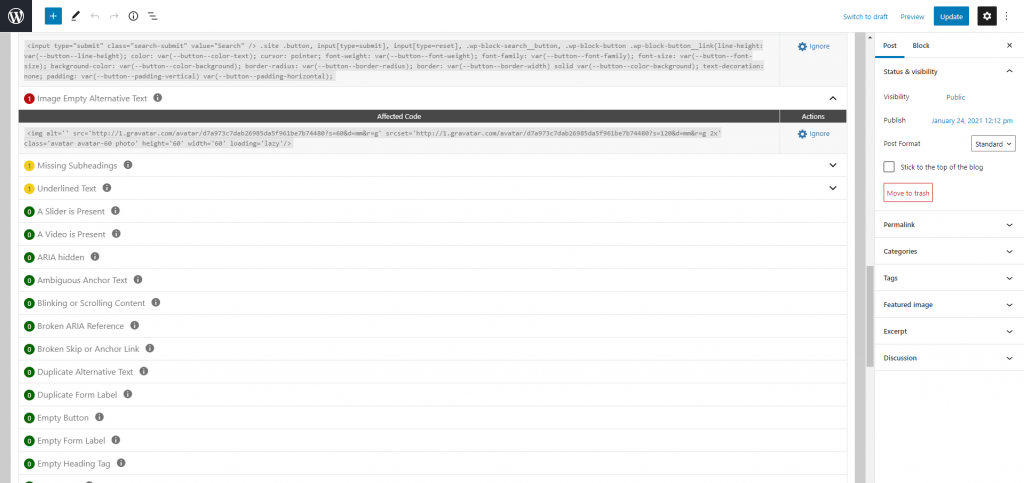
And when you switch to the Details tab, you get a comprehensive list of every single warning and error on the page. This is essentially your To-Do list in terms of optimizing your site’s accessibility.
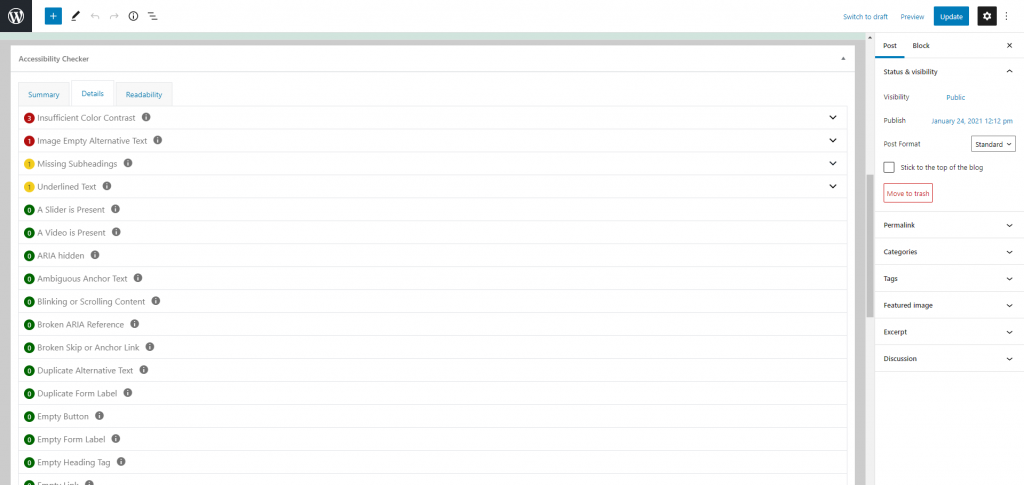
The factors Accessibility Checker Pro takes into consideration include basic problems like missing alt tags on images and missing transcripts for video and audio content, but also advanced issues like insufficient colour contrast in certain page sections, fonts that are too small, and links that aren’t underlined or otherwise clearly readable. And that’s just to name a few. It’s really quite impressive.
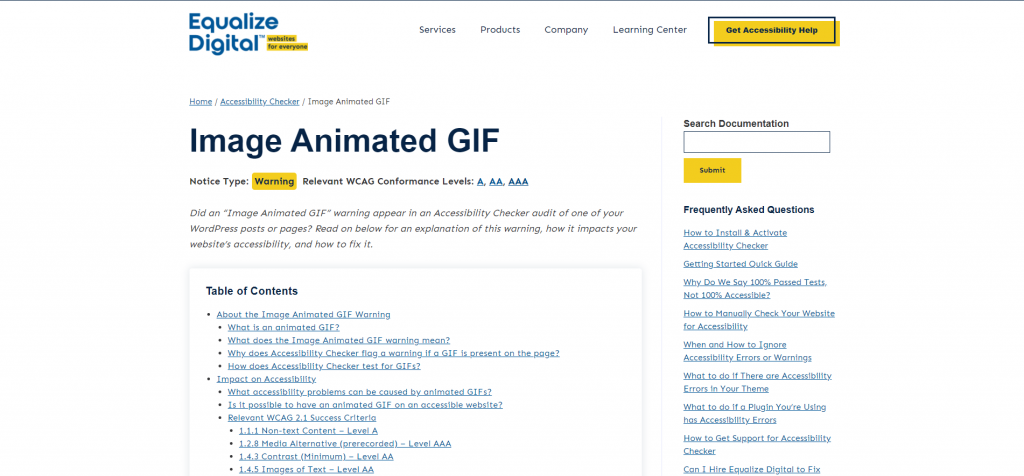
What’s even more impressive is how the developers made sure you have absolutely all the necessary information at your fingertips. Click on the question mark next to each error and you’ll be taken to a separate and extremely detailed page explaining what that error means, how it impacts accessibility, and what you can do to fix it.
But besides simply educating you on accessibility, the developers have also made sure all the info they provide is actionable. Simply click on any error on the list, and you’ll be presented with the precise piece (or pieces) of code that triggered it. This makes locating and alleviating accessibility issues on your site both faster and easier.
The Readability tab does exactly what you expect it to. It grades your readability and provides suggestions on how to improve it, similar to some of the more popular SEO plugins or grammar checkers. This is also where you’ll be prompted to add a simplified summary if you post has a reading level higher than 9th grade.
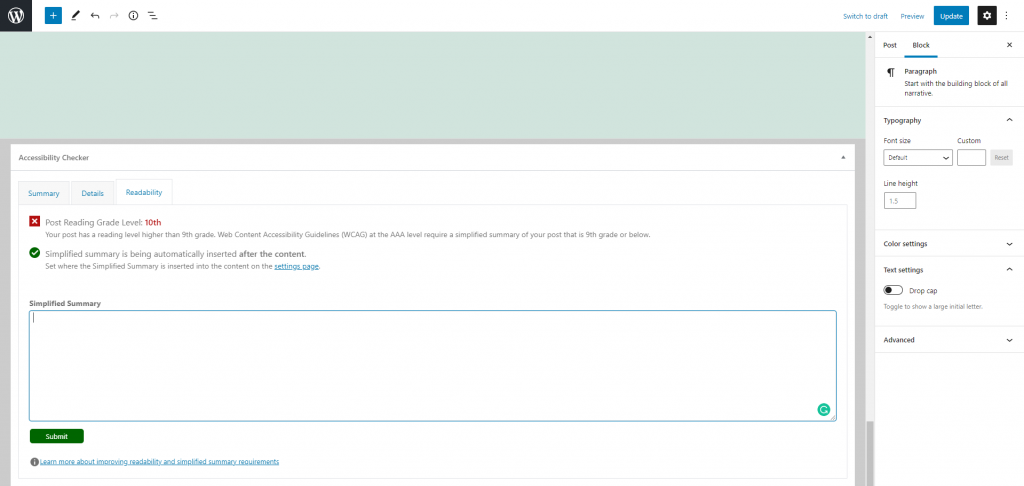
The more I use this plugin, the more I admire its simplicity. The developers do a great job of directing your attention to where it’s most needed. With just these three tabs, you’ll have all the necessary tools to optimize every page and post on your site and ensure complete accessibility.
Pricing
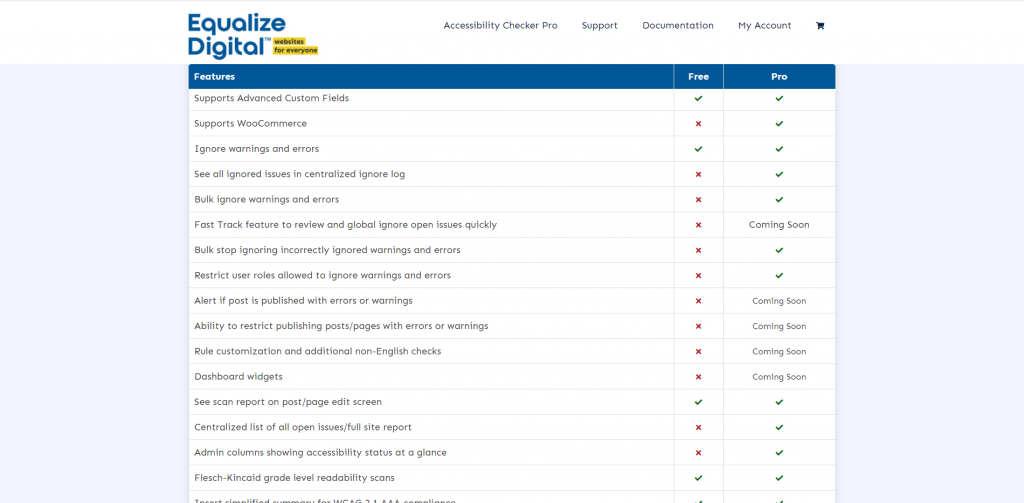
I already mention the free version of Accessibility Checker. And if you’re still not sure whether this is the right plugin for you, you might want to check that out before committing to the Pro version. But as far as features go, Accessibility Checker Pro is leagues ahead.
So, how much will this plugin cost you? It depends. Pricing ranges from $149 per year for a single site to $1049 for 10 sites. And if you need more than 10, you can contact the developers for a custom evaluation.
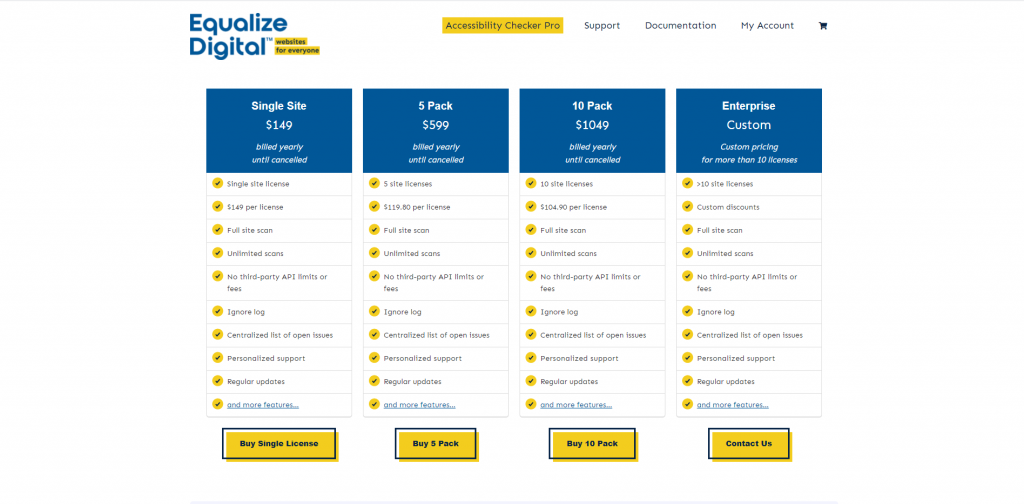
Each of the pricing packages offers the full version of the plugin with all its features. The only major difference is in the number of sites your license will be applicable to.
Verdict
Is it worth it? If you’re looking for a thorough yet simple tool to keep track of and improve your website’s accessibility, I’d say yes. Accessibility Checker Pro is absolutely worth it. When you do the math, the single site package turns out just over 12 dollars a month. That’s a bargain for a tool like this. And the larger the license, the cheaper it gets. Again, if you’re still on the fence, try out the free version to get a feel for the plugin. As far as I’m concerned, I’ve only been using Accessibility Checker Pro for a few days, and I’m already a fan.


