Last Updated on by Eddie Kremanis
 WooCommerce is amazing.
Hands down. You can’t beat it when developing an eCommerce website on the WordPress platform, and it stacks up well in terms of scalability next to systems like Magento, Shopify and BigCommerce.
Heck, if you have any intention of opting for a different WordPress plugin to build your online store, I would highly recommend revisiting the benefits of WooCommerce.
It has a quick installation for beginners and advanced users, provides beautiful backend features for things like inventory management and product creation, and the internet is packed with WooCommerce compatible themes that pretty much give you a full-fledged store right out of the box.
With over 230,000 verified physical business locations using WooCommerce in the United States, it’s a popular option with developers who are improving the system every year.
The only problem we see with new eCommerce webmasters is going from that simple, five or ten product shop, to something grand, with sliders, social media integration, hundreds of products, SEO and all the other bells and whistles you would expect when landing on a credible online store.
So, keep reading to learn more about installing and configuring WooCommerce to achieve a smooth and beautiful online store.
Start by Installing Your WordPress Website on a Reputable Host
Finding a reputable host is for more than getting your website up and running online. It’s about security, speed and overall optimization. Although we won’t go through the entire process of locating a quality hosting company and installing WordPress onto said host, we recommend you check out the guide we’ve linked to for a detailed tutorial.
In general, the majority of hosting companies have one-click WordPress installation buttons, so the process is easier than ever.
Locate a Theme That’s Perfect for WooCommerce
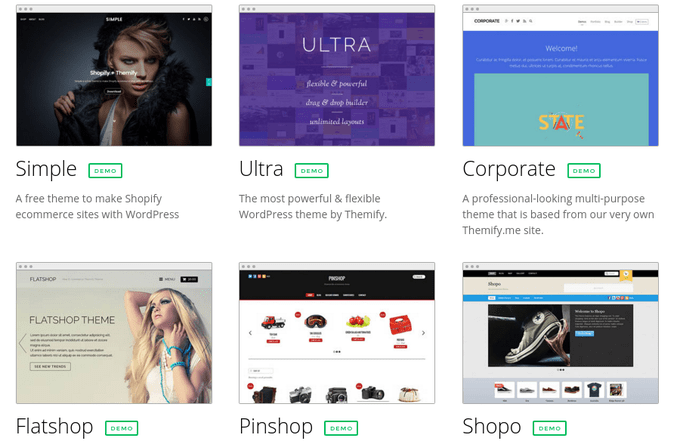
Although WooCommerce is technically designed to be installed on any WordPress theme, the prudent eCommerce webmaster is looking for a theme that is specifically built to support and run well with the WooCommerce plugin.
It’s pretty easy to find some of these options, considering the top WordPress theme developers provide filters to locate their themes that have WooCommerce functionality.
If you’re looking for some quick links to some awesome WooCommerce theme recommendations, here are a few that we like:
Listing a selection of WooCommerce themes would take a whole separate article, so we recommend browsing through the selections of the following vendors and marketplaces:
Your goal when selecting a WordPress theme entails making a list of all the features you’d like to see without having to go out and get third party plugins. It would be nice to select a theme that includes color combinations similar to your branding, along with quick logo and media upload settings.
We particularly enjoy themes that cut down the amount of plugins needed, so look for items like drag and drop builders, social media buttons, clean checkouts, sliders, responsive elements (a must-have nowadays,) multiple post formats, a seamless WooCommerce integration, product roundup widgets and more.
Installing a WooCommerce Theme, Along with the WooCommerce Plugin
Upon selecting a theme that meets your standards, the next step is to install that particular theme. If you’re not familiar with how the process goes, we’ll walk you through it.
First of all you’ll want to navigate to the backend of your WordPress dashboard. Go to the left hand side of the dashboard and go to Appearance > Themes.

This loads up a new page with a few buttons towards the top. Select the Upload button to proceed.
![]()
Now you should push on the Choose File option to open up the files that are currently on your computer. As with all WordPress themes, you will need to buy a premium theme and upload it this way. You could also search for a free theme in the WordPress dashboard, but we highly recommend going with a premium theme if you’re making a legitimate eCommerce website.
Anyway, after selecting the Choose File button, you should be able to locate the theme zip file and activate it on your site. Depending on the theme, you may have some demo content to upload, which is handy for making your online shop look like what it does on the developer’s sales page.

After your theme is set, it’s time to get WooCommerce installed on the backend. This time in your dashboard, go to Plugins > Add New. You have the option to download the WooCommerce plugin from the WooThemes product page, but it’s a more manual technique. Therefore, we’ll be handling everything on the WordPress dashboard.

A list of recommended plugins will show up on this page, but you need to navigate to the far upper right hand side. A search box should be sitting right there, so type in “WooCommerce” and search for it.
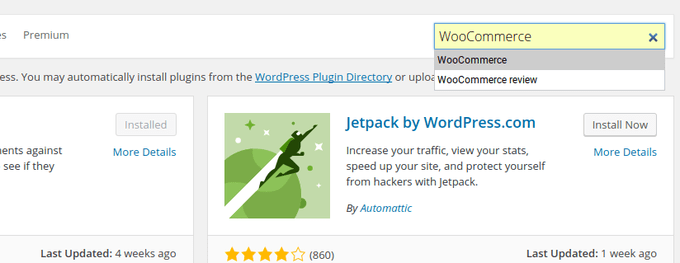
A few WooCommerce plugins are available, but you’re looking for the one with millions of installations, built by WooThemes. Click on the Install Now button.
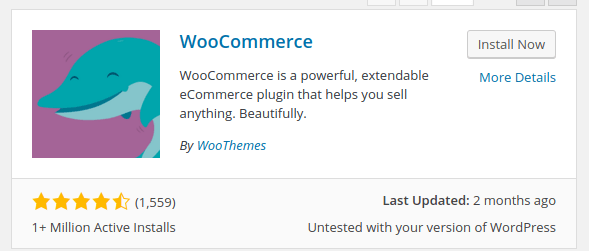
After WooCommerce unpackages itself, click on the Activate Plugin link.

The WooCommerce plugin is now completely setup on your website. Therefore, you technically have the functionality of an online store. However, you’ll want to configure quite a few settings to launch.
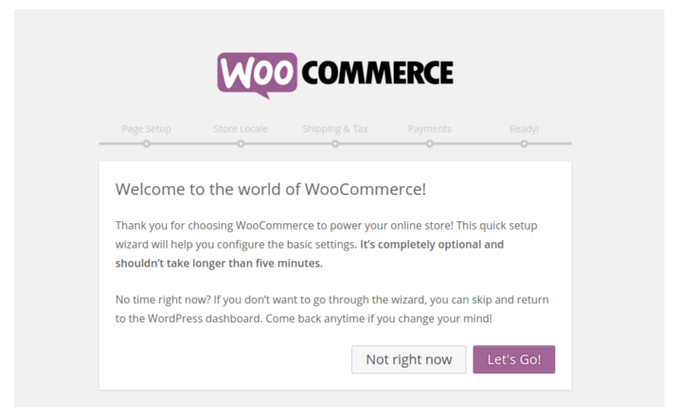
A welcome page reveals itself to walk you through the more essential items that you will want to configure. In the past, this was a far more tedious process, so we recommend going through the steps as they have them laid out perfectly. So, select the Let’s Go button to move on.
Setup Your Essential Pages
Products are generally the first order of business with eCommerce webmasters. However, this is going to initially focus on getting the more crucial pages setup for your site to work properly.
These are non-product pages, and they include the following: Shop, Cart, Checkout and My Account.
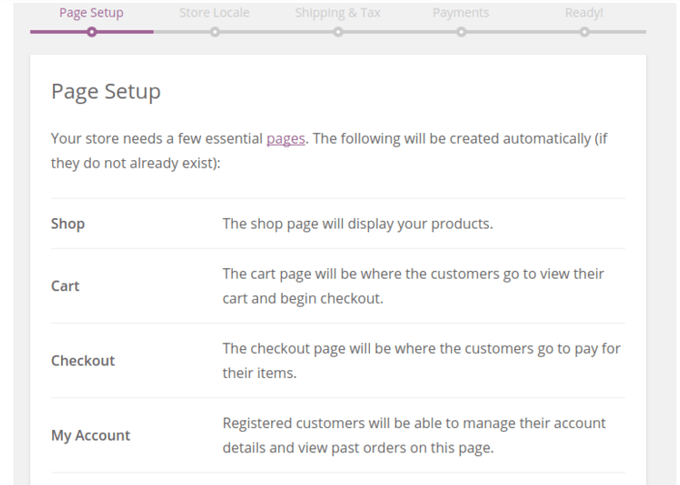
There’s not much to this step, so you can simply click on the continue button to tell WooCommerce that you would like the system to automatically generate these four pages for you. It’s a beautiful step as well, because you would spend a significant amount of time configuring these yourself.
In addition to the four primary pages, we recommend taking note of the other pages that are typically included on eCommerce shops. You don’t have to make all of them, but it’s nice having a list for future reference:
- A homepage
- FAQ
- Security information
- Support
- Contact Us
- About Us
- Help
- Shipping
- Returns
- Privacy policy
- Email signups
- Blog
- Measurement and size guides
Configure Your Store Locale, Shipping and Taxes
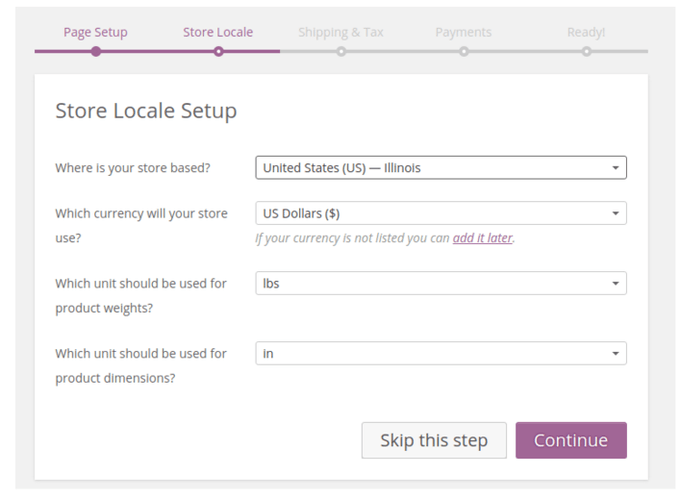
The next module asks about your store locale. This means exactly where you plan on running your business. If you’re located in the United States, select a state as well. Choose the currency you’d like to complete business with, along with the units for product dimensions and weights. Keep in mind that your location is very important for maintaining a legal entity, while also providing useful information (like the right currency) to your customers. Select the Continue button to move forward.
The Basic Shipping and Tax Setup page may seem a little confusing at first, but it’s recommended that you at least punch in something here as a placeholder. Specify that you’ll be shipping products (only if you’re selling physical items,) and punch in an estimated dollar amount for the domestic shipping and international shipping costs. You can complete this based on cost per order or cost per item.
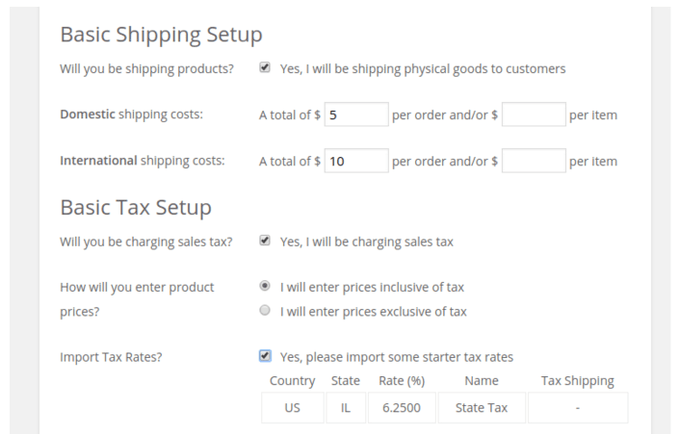
The Basic Tax Setup asks if you’ll be charging sales tax, which is most often the case. However, it’s wise to look up your own local laws instead of listening to us. Why? Because, for example, if you live in the United States, the tax laws are drastically different from state to state.
Choose whether you’ll enter prices with tax included, then move onto the last area, which is very important. Fortunately, WooCommerce allows you to import some starter tax rates. These are all based on the location of your business, so you can at least get started with some sort of tax charging before looking into it a little further.
Connect a Payment Gateway That Works for You
A payment gateway serves as the tool for collecting payments from customers, checking to see if they are not fraudulent or rejected, and placing the money into your account after the purchase.
PayPal is the payment gateway that comes to mind for most people, but quite a few other solutions are offered for companies in different countries, or for businesses that figure out that a certain plan, from a certain provider, is more cost effective than something like PayPal.
Options like PayPal, Stripe and Authorize.net can all be setup through WooCommerce. If you know your payment gateway at this time, go ahead and fill in the details on your checkout settings screen. If you’re not sure, either type in a fake PayPal address, or a real one if you have one.
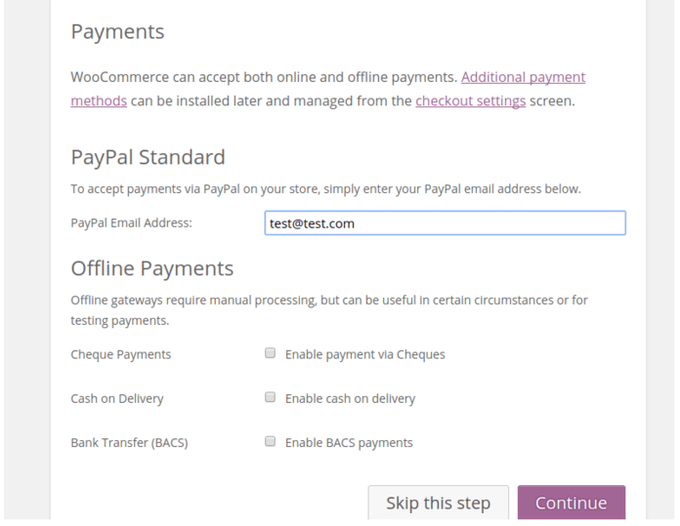
Check payments, cash on delivery and bank transfers are also optional, but once you’re done with this final step, click on the Continue button.
Getting Your Products on the Site
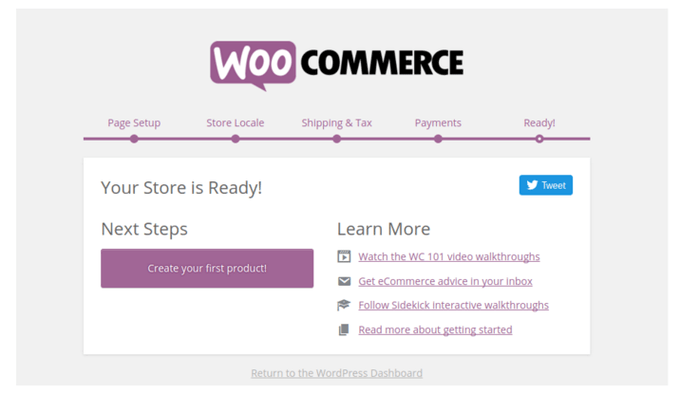
Congrats! You’re pretty darn close to running a pretty good looking WooCommerce website. Select the Create Your First Product option to really start filling your site with useful content.
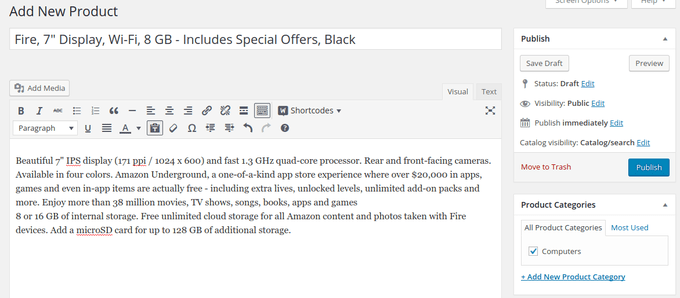
Every time you make a product page it will look like this. It’s actually pretty similar to that of a WordPress blog post, so you can start with what WooCommerce navigates you to, or use the Add Product button on your toolbar.

Once in the product page creation area, fill in the title and description. This shows up to your customers and the search engines, so make it good.
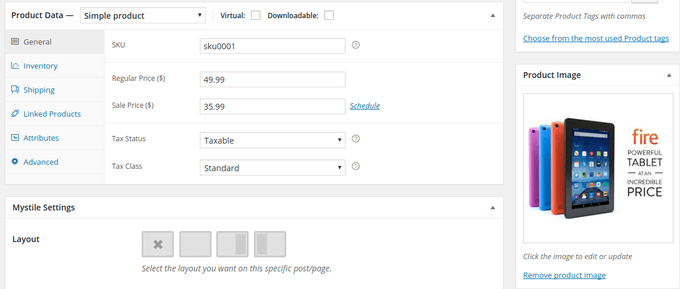
The Product Data module is one of the more complex of the bunch. It completely depends on what type of product you’re creating, but for this post we’re going to do a Simple Product. Fill in your SKU number, price, sale price, tax status and tax class.
Other tabs in the area include Inventory, Shipping, Linked Products, Attributes and Advanced. Much of it has already been filled in with the steps we took before, but we recommend taking a look at it when you have a chance.
On the right hand side you’ll see an area to upload a product image. This is your primary product image, so it’ll show up first.
The Product Short Description reveals itself when you have this product in widgets, carousels and galleries. So, your store showcase will have this description to grab attention from users, and also to improve your SEO. Next to that, we recommend uploading as many pictures as possible to the gallery.

Push the Publish button to see the result of your work. As you can see, the title, pictures and descriptions are all displayed nicely, along with a review module and an Add to Cart button.

Gaining Beauty and Effectiveness
Every theme is completely different, so it would be silly to write an article on how to manage and design the elements that come with an individual theme. However, we would like to cover some tips for cleaning up your homepage, organizing your products and having a presentable site overall:
- Create useful navigation with breadcrumbs, menus, filters and categories.
- Try the Yoast SEO plugin to move up in the rankings.
- Implement a slider to showcase promotions, events and new products.
- Publish on a blog consistently.
- Insert an email subscribe form on your homepage.
- Have a unique selling proposition on the homepage.
- Include a search bar at the top of the homepage.
- Go to the extension store to see if anything is there for you to scale up.
- Test your WooCommerce checkout and shopping cart like crazy.
Conclusion
There you have it! Installing and configuring WooCommerce takes a few steps, but it’s worth it in the end. If you would like to share your own thoughts on developing a WooCommerce website, drop a line in the comments section below.





Awsome post and straight to the point. I am not sure if this is actually the best place to ask but do you guys
have any ideea where to employ some professional writers?
Thank you 🙂
NO, this is probably not the best place to look for writers. 🙂
Depends on what sort of content you are looking for. If anything related to WordPress check out our team of freelance writers on about us page. I’m sure they can help you out.
If not, I suggest you start with UpWork.com or peopleperhour.com